こんにちは。エクセルソフトの田淵です。
弊社取り扱いの Kudan AR SDK のエントリーです。
SDK のダウンロードは こちら からお申込みください。SDK を使った開発と、個人開発者のリリースは無料でご利用いただけます。企業の方は有料になりますので、@ytabuchi までご連絡ください。
前回の Android のエントリーではマーカーの上に画像を表示させるところまでをやりました。
今回は 3D モデルを表示してみたいと思います。
現時点でのサンプルコードは ytabuchi の Github にアップしてあります。この後もコミット追加していくのでスナップショットです。
画面(activity_main.xml)の編集
前回は全画面でカメラを表示するだけでしたので、activity_main.xml はいじっていませんが、今回はマーカー上に表示するオブジェクトを変更できるようにボタンなどを配置していきます。
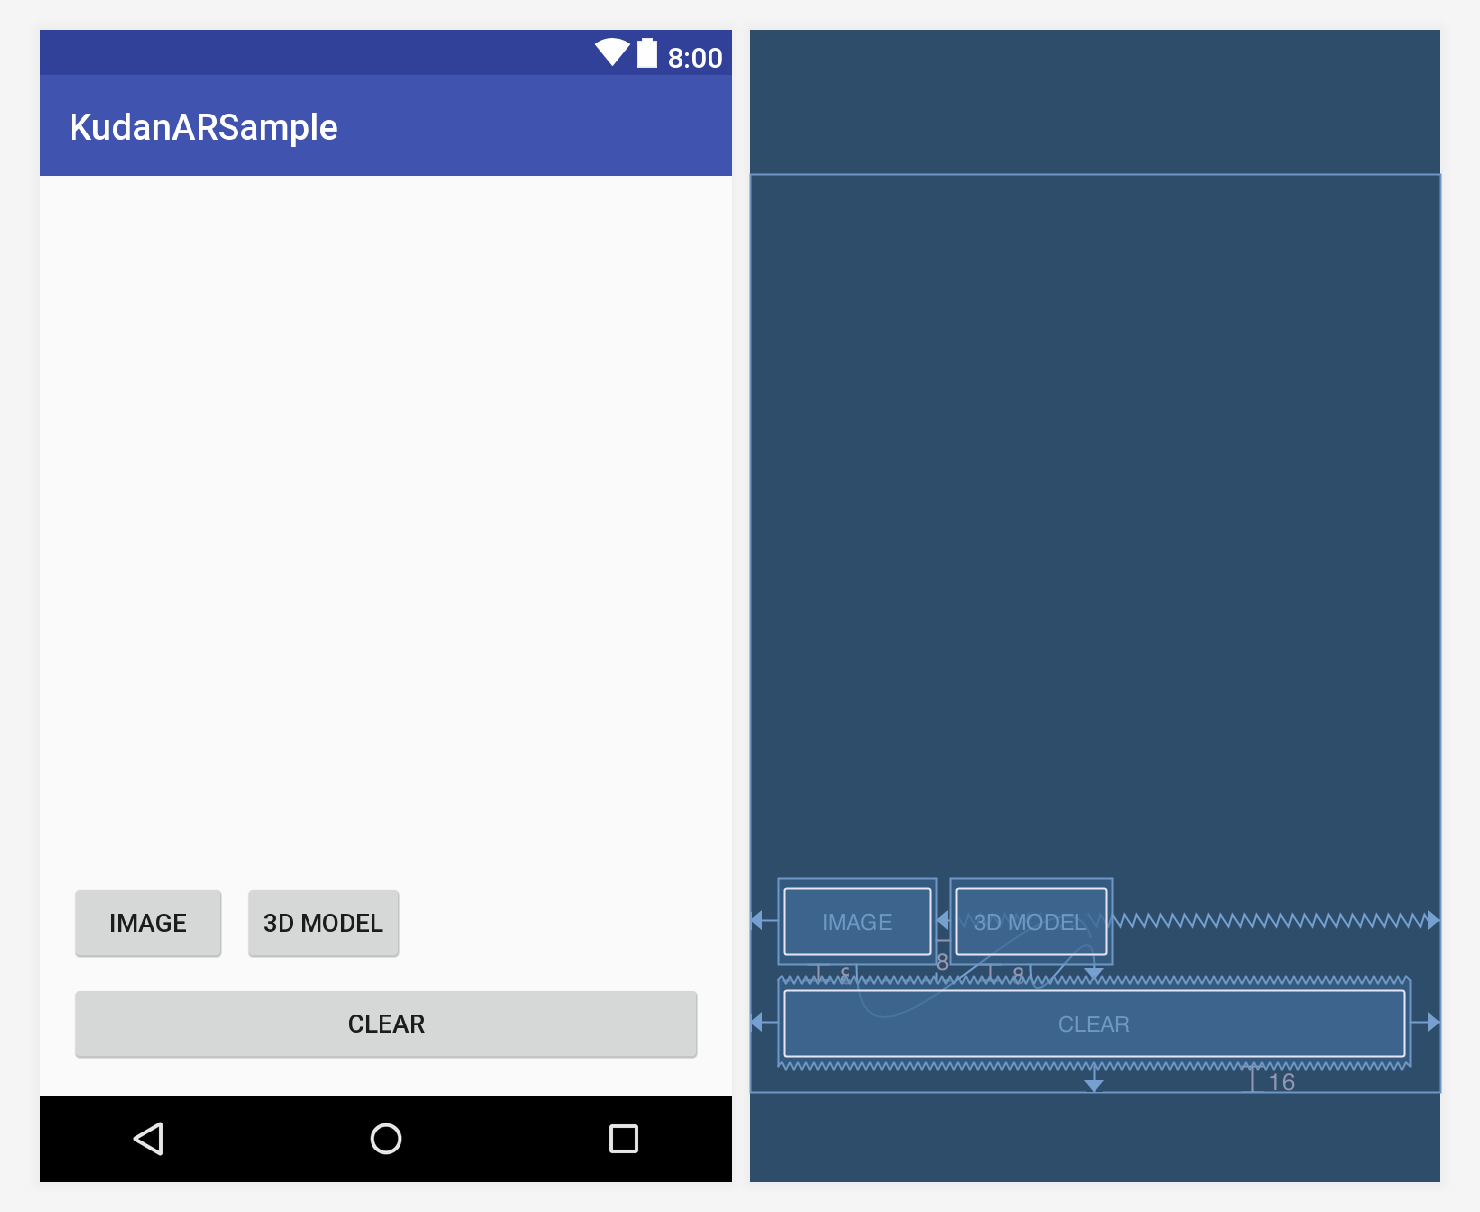
こんな感じになるように、XML を以下のように修正します。今回はボタンの OnClick のイベントをそれぞれ「showImageButtonClicked」、「showModelButtonClicked」、「clearAllButtonClicked」と指定しました。
<?xml version="1.0" encoding="utf-8"?>
<android.support.constraint.ConstraintLayout xmlns:android="http://schemas.android.com/apk/res/android"
    xmlns:app="http://schemas.android.com/apk/res-auto"
    xmlns:tools="http://schemas.android.com/tools"
    android:layout_width="match_parent"
    android:layout_height="match_parent"
    tools:context=".MainActivity">

    <Button
        android:id="@+id/showImageButton"
        android:layout_width="wrap_content"
        android:layout_height="wrap_content"
        android:layout_marginBottom="8dp"
        android:layout_marginStart="16dp"
        android:onClick="showImageButtonClicked"
        android:text="Image"
        app:layout_constraintBottom_toTopOf="@+id/button"
        app:layout_constraintEnd_toEndOf="parent"
        app:layout_constraintHorizontal_bias="0.0"
        app:layout_constraintStart_toStartOf="parent" />

    <Button
        android:id="@+id/showModelButton"
        android:layout_width="wrap_content"
        android:layout_height="wrap_content"
        android:layout_marginBottom="8dp"
        android:layout_marginLeft="8dp"
        android:onClick="showModelButtonClicked"
        android:text="3D Model"
        app:layout_constraintBottom_toTopOf="@+id/button"
        app:layout_constraintLeft_toRightOf="@+id/showImageButton" />

    <Button
        android:id="@+id/clearButton"
        android:layout_width="0dp"
        android:layout_height="wrap_content"
        android:layout_marginBottom="16dp"
        android:layout_marginEnd="16dp"
        android:layout_marginStart="16dp"
        android:onClick="clearAllButtonClicked"
        android:text="Clear"
        app:layout_constraintBottom_toBottomOf="parent"
        app:layout_constraintEnd_toEndOf="parent"
        app:layout_constraintStart_toStartOf="parent" />

</android.support.constraint.ConstraintLayout>
これで、表示するオブジェクトを選択したり非表示にしたりできるようになりました。コードを書いていきましょう。
コード(MainActivity.kt)の編集
Setup の整理
最初に前回の Setup を分解して addImageTrackable、addImageNode メソッドに分け、addModelNode を追加しましょう。
コードを分けただけですが、ImageNode を追加した後で、ボタンで表示をしたいので imageNode の visible プロパティを false にしています。
private fun addImageTrackable(){

    // Initialise the image trackable and load the image.
    imageTrackable = ARImageTrackable("Lego")
    imageTrackable.loadFromAsset("lego.jpg") ?: return

    // Get the single instance of the image tracker.
    val trackableManager = ARImageTracker.getInstance()
    trackableManager.initialise()

    //Add the image trackable to the image tracker.
    trackableManager.addTrackable(imageTrackable)
}

private fun addImageNode(){

    // Initialise the image node with our image
    val imageNode = ARImageNode("cow.png")

    // Add the image node as a child of the trackable's world
    imageTrackable.world.addChild(imageNode)

    // imageNode のサイズを Trackable のサイズに合わせる
    val textureMaterial = imageNode.material as ARTextureMaterial
    val scale = imageTrackable.width / textureMaterial.texture.width
    imageNode.scaleByUniform(scale)

    // 初期状態で非表示
    imageNode.visible = false
}
続いて 3D モデルを表示するメソッドを作成します。最初に表示する 3D モデル(ben.jet と bigBenTexture.png)に必要なファイルを Assets に追加します。(前回と同じく、Finder でコピーして Android Studio でペーストしました。)
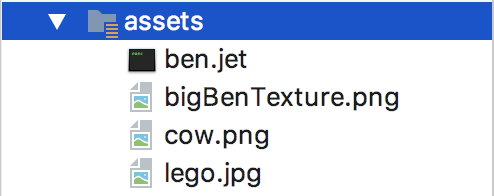
その後、以下のメソッドを MainActivity に追加します。
private fun addModelNode(){

    // Asset から 3D モデルをインポートします。
    val modelImporter = ARModelImporter()
    modelImporter.loadFromAsset("ben.jet")
    val modelNode = modelImporter.node as ARModelNode

    // 3D モデルのテクスチャーを読み込みます。
    val texture2D = ARTexture2D()
    texture2D.loadFromAsset("bigBenTexture.png")

    // テクスチャーマテリアルにテクスチャーをセットします。
    val material = ARLightMaterial()
    material.setTexture(texture2D)
    material.setAmbient(0.8f, 0.8f, 0.8f)

    // 3D モデルのメッシュにマテリアルを適用していきます。
    for (meshNode in modelImporter.meshNodes) {
        meshNode.material = material
    }

    modelNode.rotateByDegrees(90f, 1f, 0f, 0f)
    modelNode.scaleByUniform(0.25f)

    // Add model node to image trackable
    imageTrackable.world.addChild(modelNode)

    // 初期状態で非表示
    modelNode.visible = false
}
これで画像と 3D モデルを呼び出す準備ができました。これらのメソッドの後に、全ての Node を非表示にするメソッドも追加しておきます。
// 全ての Node を非表示
private fun hideAll(){
    val nodes = imageTrackable.world.children
    for (node in nodes)
        node.visible = false
}
分解した Setup は次のようになります。
override fun setup() {

    addImageTrackable()

    addImageNode()
    addModelNode()
}
ボタンのクリックイベントを記述
最初に配置した 3つのボタンのクリックイベントを作りましょう。world には追加した順番で children が作られていますので、決め打ちで表示、非表示をしています。
fun clearAllButtonClicked(view: View){
    hideAll()
}

fun showImageButtonClicked(view: View){
    hideAll()
    imageTrackable.world.children[0].visible = true
}

fun showModelButtonClicked(view: View){
    hideAll()
    imageTrackable.world.children[1].visible = true
}
これで完成です。現時点での MainActivity は以下のようになっているはずです。
class MainActivity : ARActivity() {

    private lateinit var imageTrackable: ARImageTrackable

    override fun onCreate(savedInstanceState: Bundle?) {
        super.onCreate(savedInstanceState)

        setContentView(R.layout.activity_main)

        val key = ARAPIKey.getInstance()
        key.setAPIKey("")

        permissionsRequest()
    }

    override fun setup() {

        addImageTrackable()

        addImageNode()
        addModelNode()
    }


    private fun addImageTrackable(){

        // Initialise the image trackable and load the image.
        imageTrackable = ARImageTrackable("Lego")
        imageTrackable.loadFromAsset("lego.jpg") ?: return

        // Get the single instance of the image tracker.
        val trackableManager = ARImageTracker.getInstance()
        trackableManager.initialise()

        //Add the image trackable to the image tracker.
        trackableManager.addTrackable(imageTrackable)
    }

    private fun addImageNode(){

        // Initialise the image node with our image
        val imageNode = ARImageNode("cow.png")

        // Add the image node as a child of the trackable's world
        imageTrackable.world.addChild(imageNode)

        // imageNode のサイズを Trackable のサイズに合わせる
        val textureMaterial = imageNode.material as ARTextureMaterial
        val scale = imageTrackable.width / textureMaterial.texture.width
        imageNode.scaleByUniform(scale)

        // 初期状態で非表示
        imageNode.visible = false
    }

    private fun addModelNode(){

        // Import model
        val modelImporter = ARModelImporter()
        modelImporter.loadFromAsset("ben.jet")
        val modelNode = modelImporter.node as ARModelNode

        // Load model texture
        val texture2D = ARTexture2D()
        texture2D.loadFromAsset("bigBenTexture.png")

        // Apply model texture to model texture material
        val material = ARLightMaterial()
        material.setTexture(texture2D)
        material.setAmbient(0.8f, 0.8f, 0.8f)

        // Apply texture material to models mesh nodes
        for (meshNode in modelImporter.meshNodes) {
            meshNode.material = material
        }

        modelNode.rotateByDegrees(90f, 1f, 0f, 0f)
        modelNode.scaleByUniform(0.25f)

        // Add model node to image trackable
        imageTrackable.world.addChild(modelNode)

        // 初期状態で非表示
        modelNode.visible = false
    }

    // 全ての Node を非表示
    private fun hideAll(){
        val nodes = imageTrackable.world.children
        for (node in nodes)
            node.visible = false
    }

    fun clearAllButtonClicked(view: View){
        hideAll()
    }

    fun showImageButtonClicked(view: View){
        hideAll()
        imageTrackable.world.children[0].visible = true
    }

    fun showModelButtonClicked(view: View){
        hideAll()
        imageTrackable.world.children[1].visible = true
    }


    // Permission のリクエストを OS 標準の requestPermissions メソッドで行う
    private fun permissionsRequest(){
        if (ContextCompat.checkSelfPermission(this,
                        Manifest.permission.INTERNET) != PackageManager.PERMISSION_GRANTED || ContextCompat.checkSelfPermission(this,
                        Manifest.permission.WRITE_EXTERNAL_STORAGE) != PackageManager.PERMISSION_GRANTED || ContextCompat.checkSelfPermission(this,
                        Manifest.permission.READ_EXTERNAL_STORAGE) != PackageManager.PERMISSION_GRANTED || ContextCompat.checkSelfPermission(this,
                        Manifest.permission.CAMERA) != PackageManager.PERMISSION_GRANTED) {
            ActivityCompat.requestPermissions(this,
                    arrayOf(Manifest.permission.INTERNET, Manifest.permission.WRITE_EXTERNAL_STORAGE, Manifest.permission.READ_EXTERNAL_STORAGE, Manifest.permission.CAMERA), 111)

        }
    }

    // ダイアログを表示して、本サンプルアプリの設定画面に遷移する
    private fun permissionsNotSelected() {
        val builder = AlertDialog.Builder(this)
        builder.setTitle("Permissions required")
        builder.setMessage("Please enable the requested permissions in the app settings in order to use this demo app")
        builder.setPositiveButton("Set permission", DialogInterface.OnClickListener { dialog, id ->
            dialog.cancel()
            val intent = Intent()
            intent.action = Settings.ACTION_APPLICATION_DETAILS_SETTINGS
            intent.data = Uri.parse("package:eu.kudan.ar")
            startActivity(intent)
        })
        val noPermission = builder.create()
        noPermission.show()
    }

    // requestPermissions ダイアログの結果を受け、全て許可されていなければ、permissionsNotSelected を呼び出し
    override fun onRequestPermissionsResult(requestCode: Int, permissions: Array, grantResults: IntArray) {
        super.onRequestPermissionsResult(requestCode, permissions, grantResults)

        when (requestCode) {
            111 -> {
                if (grantResults.isNotEmpty() &&
                        grantResults[0] == PackageManager.PERMISSION_GRANTED &&
                        grantResults[1] == PackageManager.PERMISSION_GRANTED &&
                        grantResults[2] == PackageManager.PERMISSION_GRANTED &&
                        grantResults[3] == PackageManager.PERMISSION_GRANTED) {
                    // パーミッションが必要な処理
                } else {
                    permissionsNotSelected()
                }
            }
        }
    }
}
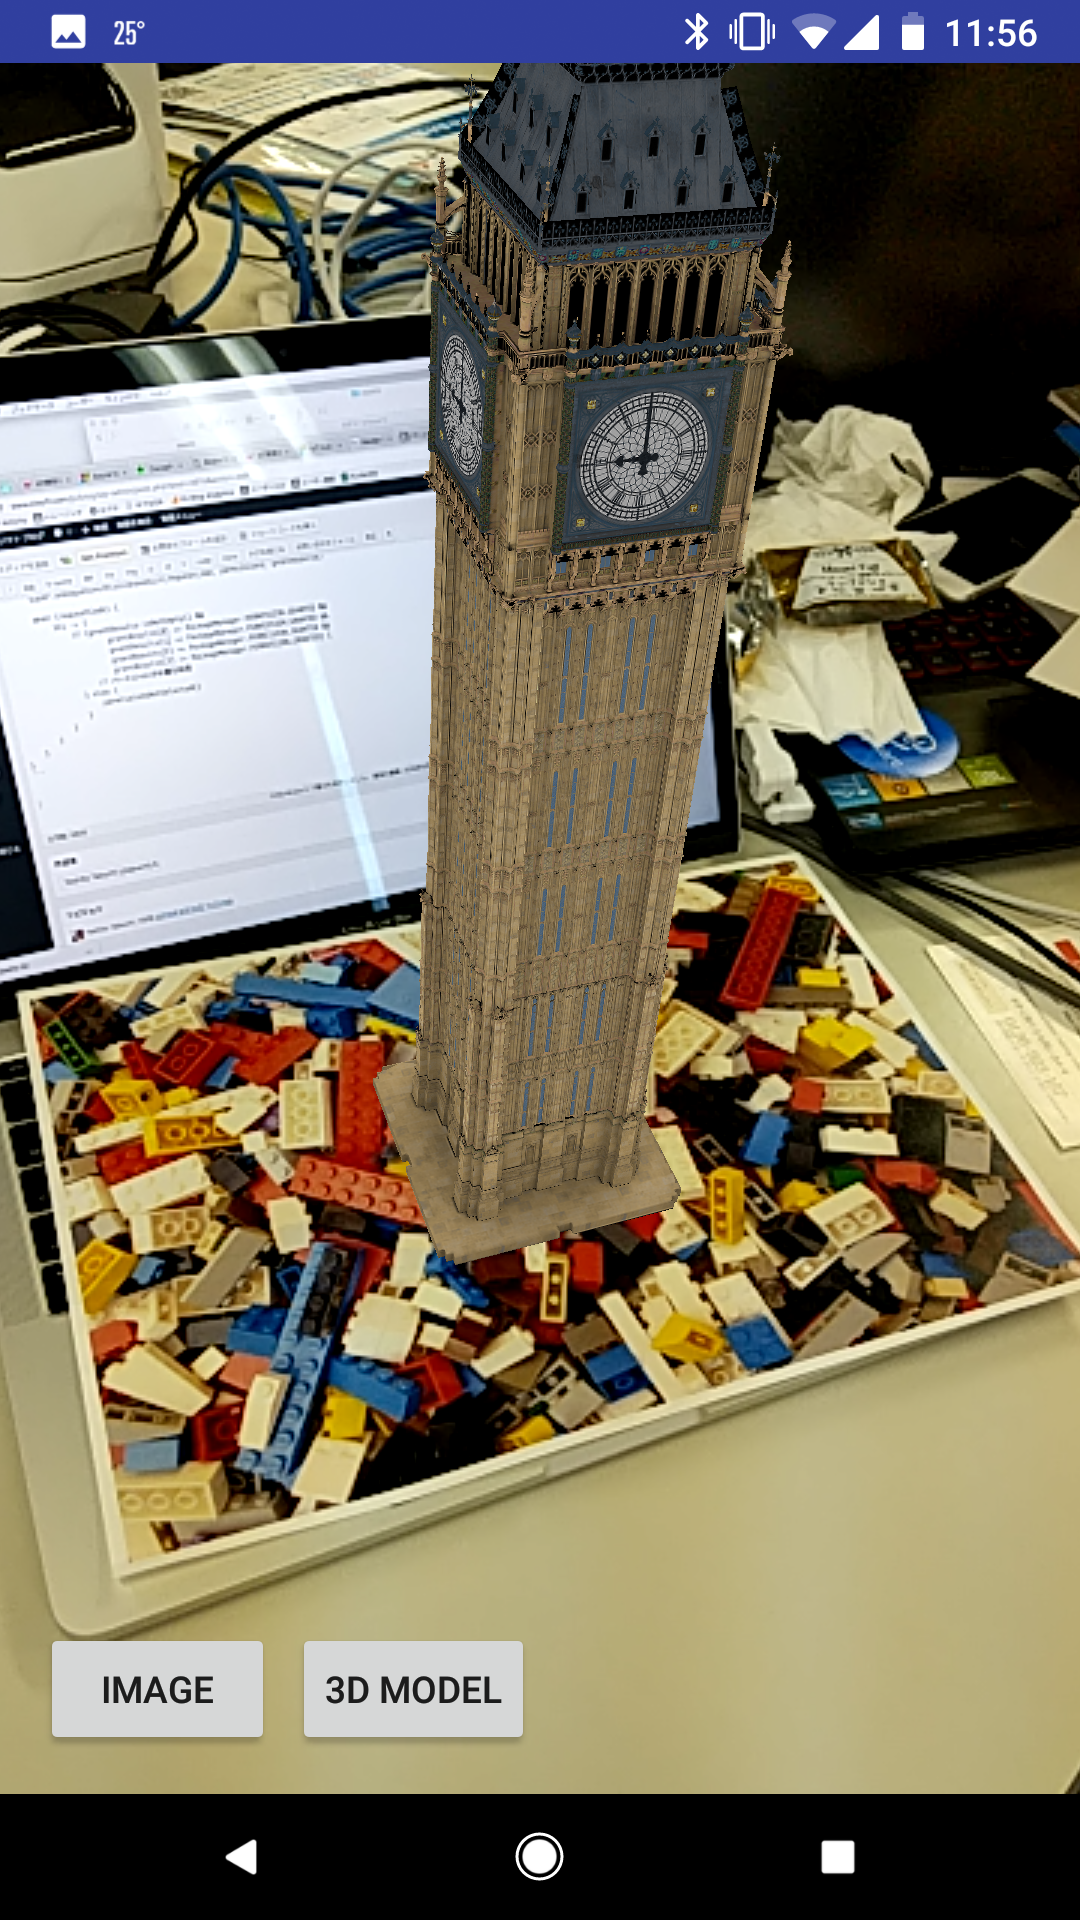
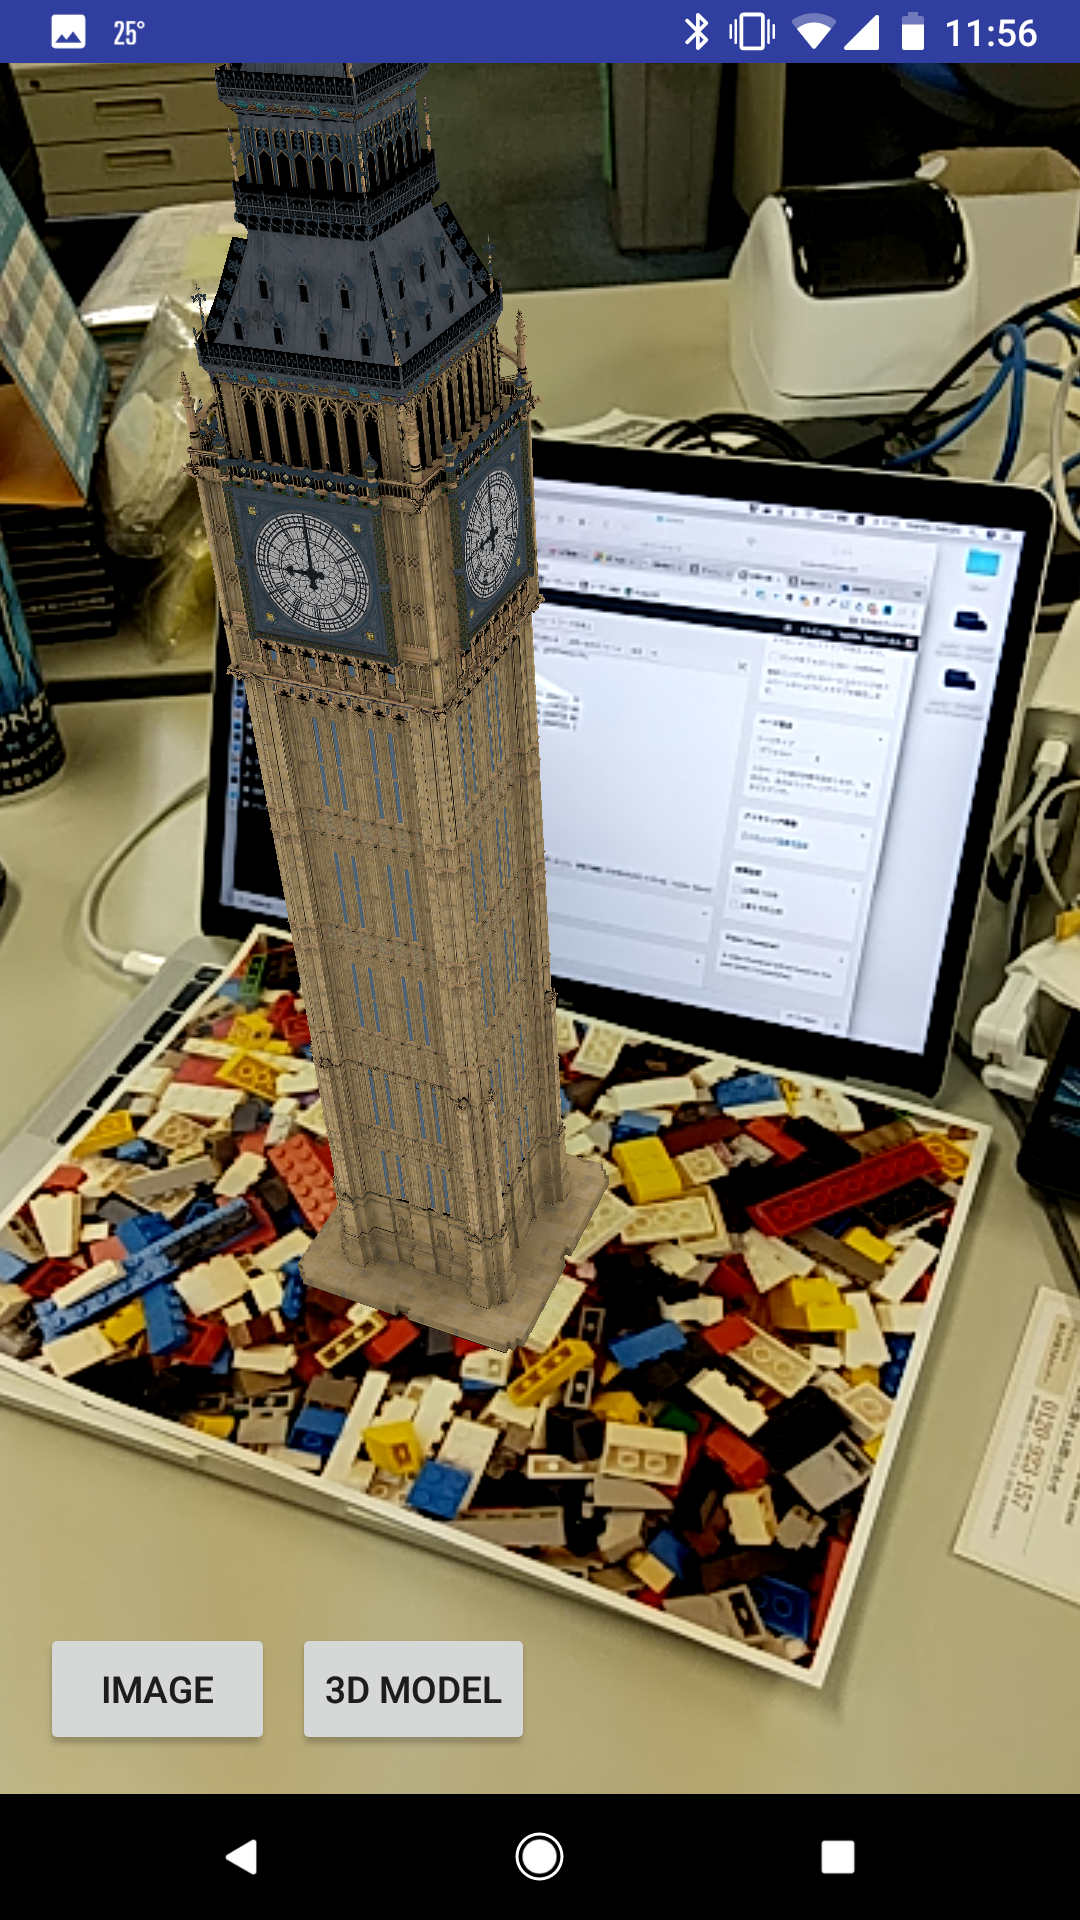
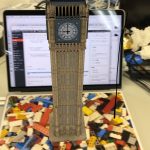
こんな感じでマーカー上に時計台が表示されていれば完成です!
この後は
次は 3D モデルを表示してみましょう。
Kudan AR SDK エントリー一覧
Kudan AR SDK チュートリアル記事まとめ | エクセルソフト ブログ
をご覧ください。
以上です。