This tutorial will show you how to setup an augmented reality project on Android using KudanAR.
Download Kudan’s AR Framework for Android
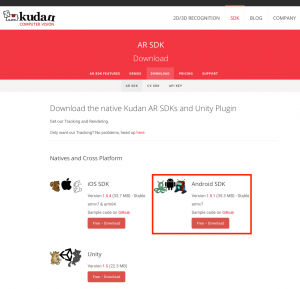
To get started, the first thing you’ll need is Kudan’s AR framework. You can download it on our Download page.
Create a new Android Studio project
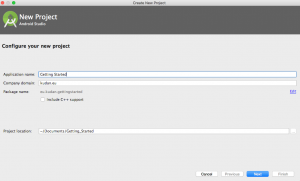
Start up Android Studio and create a new project.
Amongst other details, you’ll be required to enter an Application Name and Company Domain. These two fields together make up your Package Name. You must make sure that this is the same as the Application Identifier associated with your API Key. This will either be the Application Identifier you used when generating a free API Key, or, if you are using the Development License Key, simply com.xlsoft.kudanar.
Once you’ve made sure your [Package Name] is correct, select a save location, click next and choose a basic activity.
Import Kudan’s AR Framework to the project
Import the .aar package to your project by going to (File -> New -> New Module…) and selecting Import .JAR/.AAR package. Navigate to your newly downloaded KudanAR.aar file and open it. Name the subproject ‘KudanAR’.
Add Kudan’s module to the project
Add module folder into settings.gradle and sync gradle.
Add KudanAR as a module dependency
Go to (File -> Project Structure…), select your app module, click the dependencies tab, click the plus in the lower left and select Module Dependancy to add KudanAR as a dependancy to your project.
Add permissions and settings to your Android manifest
Add the required permissions to the manifest file. If you are building for Android 6.0 and above you will need to include a permissions request for the camera before opening your ARActivity. Click here for more information about handling permissions.
Add the configChanges and screenOrientation options to all of the activities that will display AR content.
<uses-permission android:name="android.permission.INTERNET" />
<uses-permission android:name="android.permission.ACCESS_NETWORK_STATE" />
<uses-permission android:name="android.permission.READ_EXTERNAL_STORAGE" />
<uses-permission android:name="android.permission.WRITE_EXTERNAL_STORAGE" />
<uses-permission android:name="android.permission.READ_PHONE_STATE" />
<activity android:name=".MainActivity"
…
android:configChanges="orientation|screenSize"
android:screenOrientation="fullSensor">
…
</activity>
[/code]
Adjust Gradle settings
Add the following noCompress block to the app module’s build.gradle.
This prevents Android Studio compressing important Kudan assets.
{
…
aaptOptions
{
noCompress ‘KARMarker’
noCompress ‘armodel’
}
}[/code]
{
…
aaptOptions
{
noCompress ‘KARMarker’
noCompress ‘armodel’
}
}[/code]
Add ARAPI key to activity
Open your MainActivity and change it to the following:
MainActivity
import android.support.v7.app.AppCompatActivity
import android.os.Bundle
import eu.kudan.kudan.ARAPIKey;
class MainActivity : AppCompatActivity() {
override fun onCreate(savedInstanceState: Bundle?) {
super.onCreate(savedInstanceState)
// setContentView(R.layout.activity_main)
val key = ARAPIKey.getInstance()
key.setAPIKey("<Put API Key here>")
}
}[/code]
import android.support.v7.app.AppCompatActivity;
import android.os.Bundle;
import eu.kudan.kudan.ARAPIKey;
public class MainActivity extends AppCompatActivity {
@Override
protected void onCreate(Bundle savedInstanceState) {
super.onCreate(savedInstanceState);
// Comment this out for the time being unless you plan to create UI elements
//setContentView(R.layout.activity_main);
ARAPIKey key = ARAPIKey.getInstance();
key.setAPIKey("<Put API Key here>");
}
}[/code]
Find the API Key for your corresponding Package Name:
- If using your own, this will be the key you generated on the website.
- If using the
com.xlsoft.kudanardevelopment Package Name, you can use the Development License Key. Note that while this key dos not display a Watermark, it cannot be used to upload your app to the app store. To publish your app, you will need to generate a free key on the website (see above), or purchase a license.
Set up your ARActivity
Make sure your Main Activity imports and extends MainActivity.
MainActivity
import android.support.v7.app.AppCompatActivity
import android.os.Bundle
import eu.kudan.kudan.ARAPIKey;
import eu.kudan.kudan.ARActivity;
class MainActivity : ARActivity() {
…
}[/code]
import eu.kudan.kudan.ARActivity;
public class MainActivity extends ARActivity {
…
}[/code]
This will allow you to implement the setup method in your Activity. The setup method is called when the ARActivity first loads. For example:
super.setup()
// AR Content to be set up here
}[/code]
public class MainActivity extends ARActivity
{
@Override
public void setup()
{
super.setup();
// AR Content to be set up here
}
}
[/code]
If you changed your Main Activity to look like the above, you can build and run your app. You should see a camera stream displaying on your screen, but you can’t detect or track anything just yet. We’ll change that in the next tutorial.