This quick tutorial will show you how to set up your Unity project to build for the Android platform.
Player Settings
For Android applications, set the Player Settings.
In Kudan Tracker script, click [Set App/Bundle ID], or select [Edit] -> [Project Settings] -> [Player] from the Unity menu and open [Other Settings] on the Android tab.

Rendering
Uncheck [Multithread Rendering]
Identification
Make sure that the Package Name in Identification corresponds to the API key.

The Package Name be either:
- The ID you entered when your free key was generated, in the format “com.companyName.productName”.
- If you are using the Development License Key,
com.xlsoft.kudanar.
Click here for the development license key.
To check the validity of the API Key, run the app in Play Mode. View message in the console indicating whether the API key is valid. Or view in console log when building for iOS/Android.
If the Package Name is incorrect, the tracker will not run and camera view will be blank/black.
Configuration
Set the following to support 64-bit.
- Select IL2CPP from [Scripting Backend]
- Check ARM64 in [Target Architectures]
For Unity 2019 and later
When building with Unity 2019 or later, uncheck “Player Settings > Rendering> Auto Graphics API”, add “OpenGLES3” from the “+” button at the bottom right, and delete “Vulkan”.

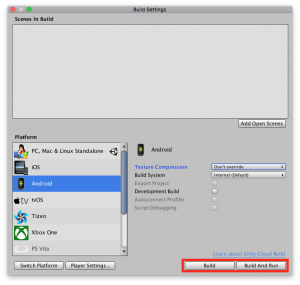
Build and Run
You can now build the app by going to File -> Build Setting and selecting Android. If you have an Android device already connected to the computer via USB, you can click “Build and Run” and the app will automatically run on the device once the build is finished. If you click “Build” you will need use the Android Debug Bridge (ADB) in order to manually install the app onto the device.