A comprehensive guide on how to use the toolkit to create AR content
Kudan’s AR SDKs utilise a number of custom operations to improve performance on mobile devices. These include:
.KARMarkermarker set – This provide a way to store multiple images in a single file, useful for loading batches of markers all at once, or for reducing the overall file size..armodelmodel file – This provides a lightweight, fast-loading model format, optimised for use on mobile devices.- Video encoding – This allows us to convert high bitrate videos and optimise them for use in a mobile application.
- Alpha Videos – This provides a way to select chroma keyed PNG files to create a video that will show with an alpha channel using KudanAR.
Marker Conversion
The marker converter tool takes a selection of image files and creates a .KARMarkerfile from them. This can be loaded in the KudanAR frameworks as a set of markers.
To use the marker converter tool, open the Marker Converter tab and click the Newbutton, choose a name for the file, and click Save. This will create a new AR Project and save a corresponding .ARProject file that can be opened by the toolkit. This will save your progress and allow you to edit your marker sets later.
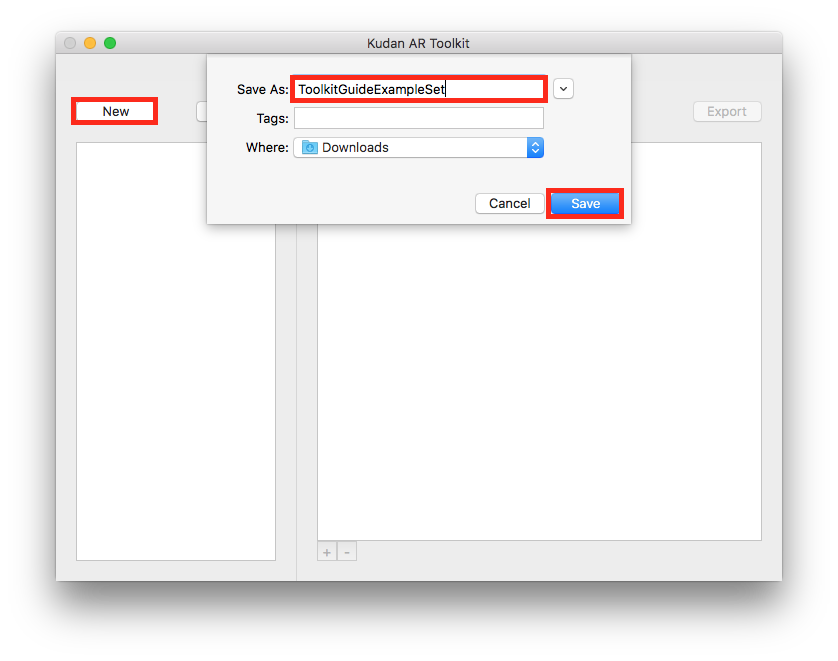
Create a new Marker set
Next, click Add Marker and select an image file to add to this marker set. If you plan to scale nodes based on the marker’s size, it is a good idea at this point to make a note of the image’s dimensions. If you are using the Unity plugin, it is necessary to make a note of the image’s name / ID. Repeat this process as many times as desired. If you want to remove an image, make sure the image you want to remove is selected, then click the - icon at the bottom of the window. You can also uncheck the “Export” box so that it isn’t included in the set when it is exported.
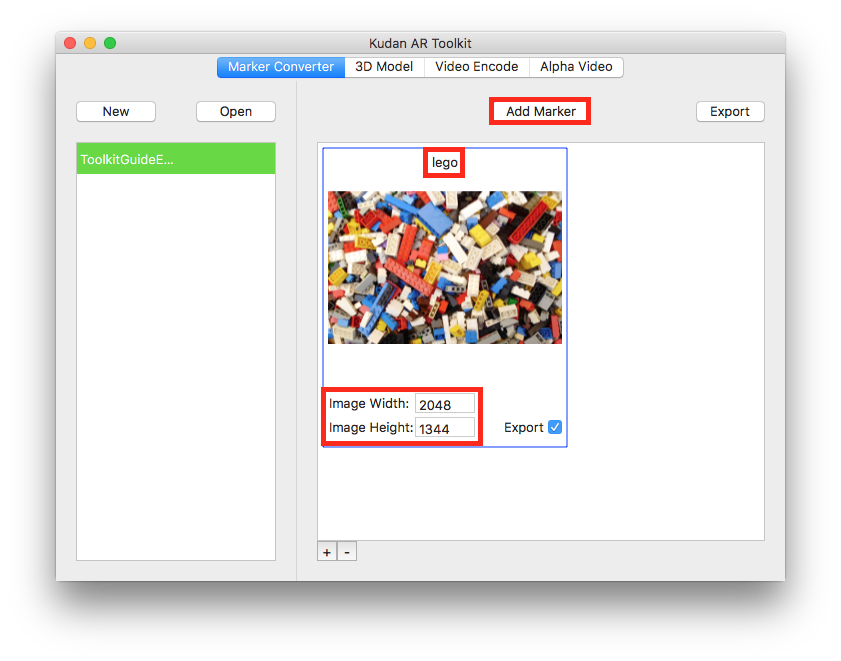
Add an image to the set
Once you have added al your images, click Export, choose a name and click Save. You will now have a .KARMarker file with the specified name. This can be loaded into the Image Tracker in the KudanAR frameworks. For more information, see our Markers page for how to add .KARMarker files to the tracker in the native SDKs, and our Unity Markers page for how to add one in the Unity Plugin.

Export the Marker set
3D Model Conversion
The model converter tool takes a 3D model in .FBX, .OBJ or .DAE format and creates a .armodel file from it. This can be loaded in the native KudanAR SDKs.
Unity
You don’t have to use the model converter tool to use models with Kudan’s Unity Plugin. Because Unity handles all the rendering, we simply hook into it, meaning that the plugin is compatible with every model type that Unity supports, and no conversion is necessary. Just drop the models directly into Unity’s assets like you normally would.
To convert your existing 3D model to be compatible with the KudanAR SDKs, select the 3D Model tab within the Toolkit. Click Select 3D Model and select the model you wish to convert.
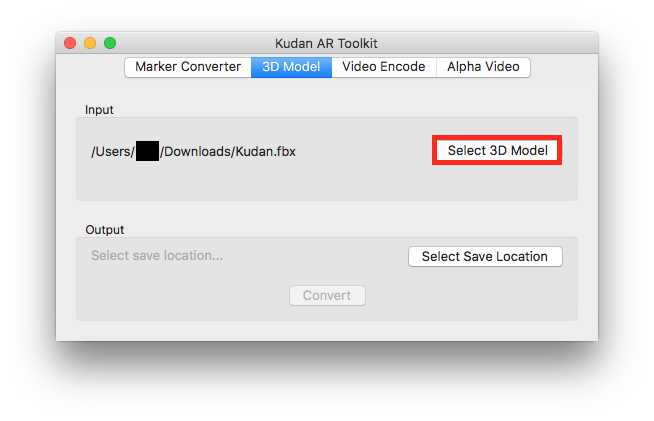
Select a model to convert
Next, click Select Save Location and navigate to the directory you want to save your .armodel in.
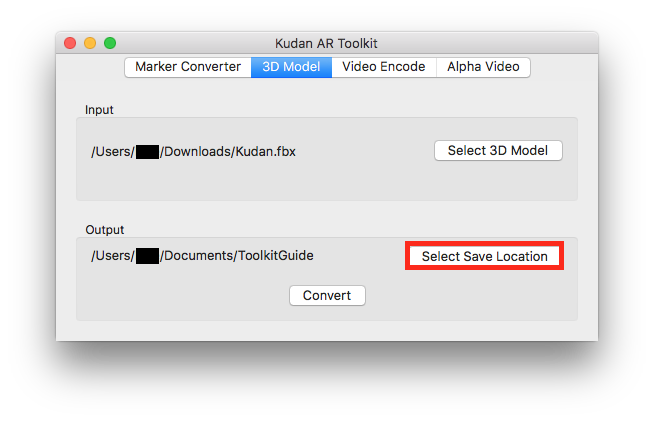
Select a save location
Lastly, click Convert. An .armodel file will appear in the specified save location.
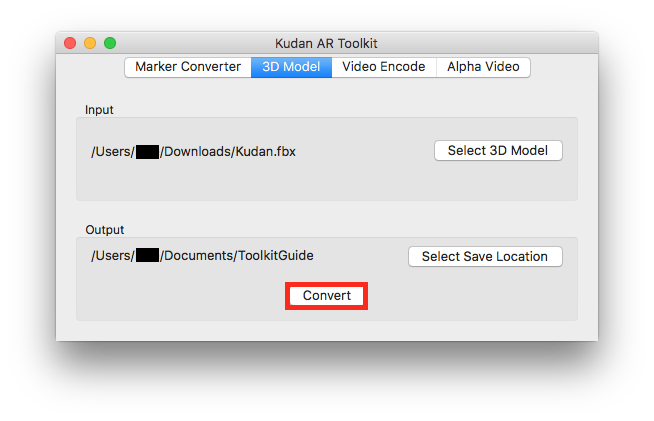
Convert the model
Android
In Android, you’ll need to make sure your .armodel does not get compressed when the app is built, otherwise it can’t be loaded properly and may cause a crash. To do this, either rename the extension of the model file to .jet or add a noCompress block to your build.gradle.
Windows
In the Windows toolkit, when converting your model, you will have an option in the save window to save it either as a .armodel or as a .jet file. ALWAYS USE .armodel. If you want to use the .jet method for avoiding Android compression, make a .armodel and rename it. DO NOT USE THE .jetOPTION. It does not work correctly at present and the framework will fail to import your model.
The new file will have the same name as the original, but it will have the .armodelfile extension.
For more information on models using Kudan, as well as how to load your model into an AR application, see our 3D Models page.
Video Encoding
The Video Encoder tool will allow you to encode your high bitrate videos into a format that is more optimised for use on mobile devices, reducing file size and improving performance.
Kudan’s AR engine renders at 30fps, for example, so it is of no use having a video that is of a higher framerate. High bitrate videos are also bloated with data that most mobile devices cannot display. Unnecessary data and extra frames are stripped from the video to considerably reduce the size of the file.
To encode your video with the Toolkit, select the Video Encode tab. Click Select Video and open the file you wish to process. The file path of the video will be displayed, along with its dimensions.
Supported File Types
The latest version of the toolkit supports encoding .mp4, .mov, .avi and .mkv files.
Video Dimensions
For the encoder to function correctly, please ensure your video’s height and width are both divisible by 2.
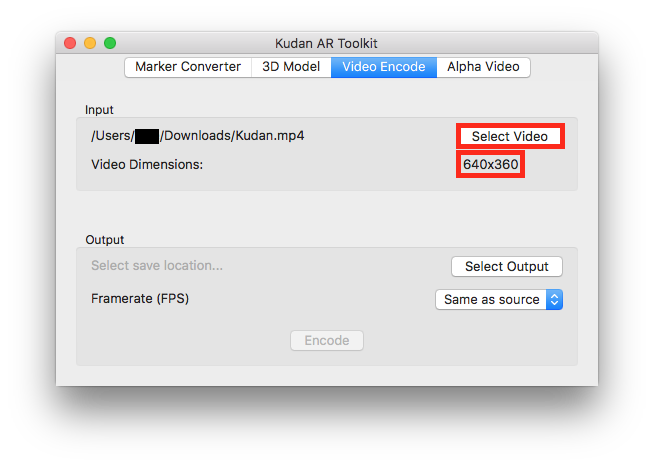
Select a Video
Next, click Select Output to choose a save location for your new video.
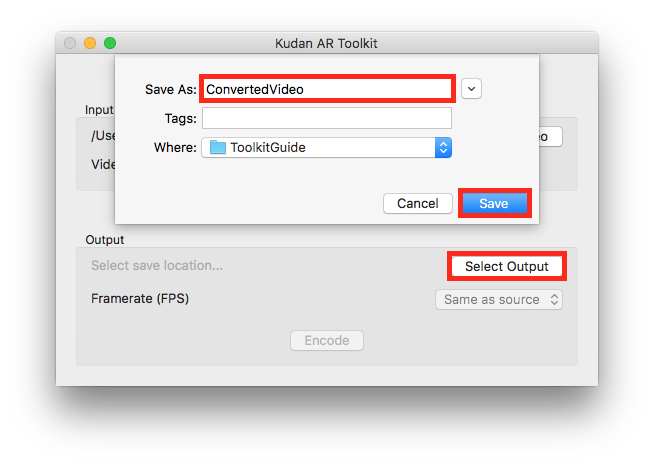
Select a save location
Once you have selected your input file and output location, you can also change the frame rate of the video. You will be able to select one of the following options:
- Same as source
- 20
- 25
- 30
If one of these options does not appear, it means your input file has a lower frame rate than that option. For example, if you have a 24fps video, then you will only see the Same as source and 20 options. The tool will not allow you to encode your file at a framerate that is higher than that of the source, because doing so would worsen the quality of the video.
Once you’re happy with the options you’ve selected, simply click Encode. Your input file will be processed and the result will be saved in the same format as the input file and with the same name.
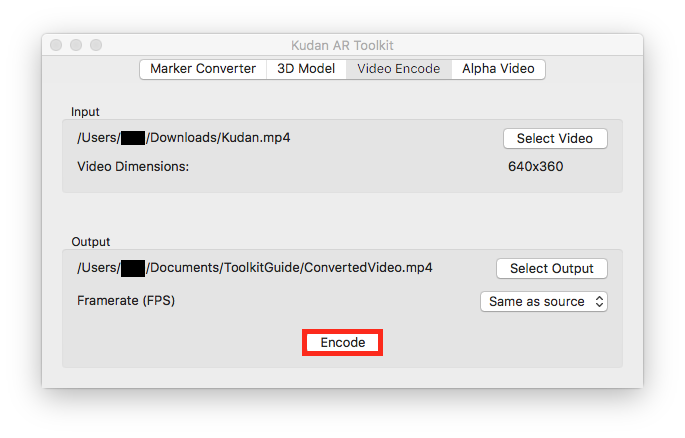
Encode your video
Alpha Video Creation
The Alpha Video tool allows you to select chroma keyed PNG files to create a video that will render with an alpha channel within KudanAR.
To create an Alpha Video, select the Alpha Video tab. Click Select Images under Input to load a number of .png files, the paths of which will be displayed in the main window.
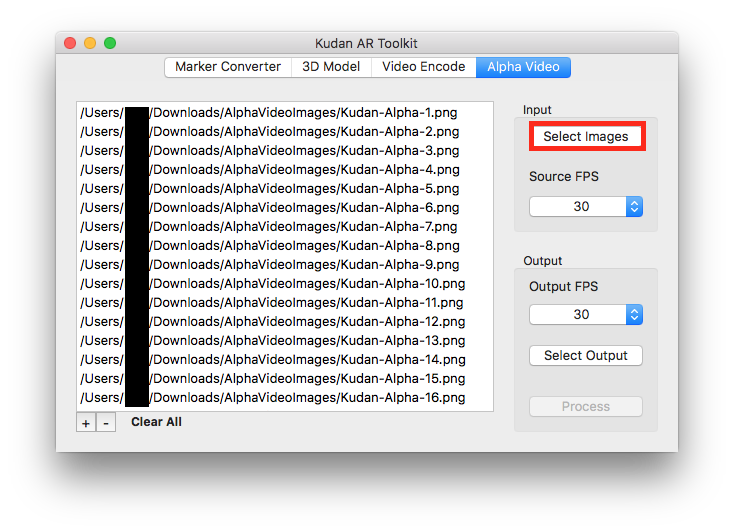
Load your image frames
You can then select both a source and target FPS for your video. These determine the overall “speed” of your video, which you can alter in order to better showcase your content. Ideally, if you have set up your images to play as a specific frame rate, both these values will be the same.
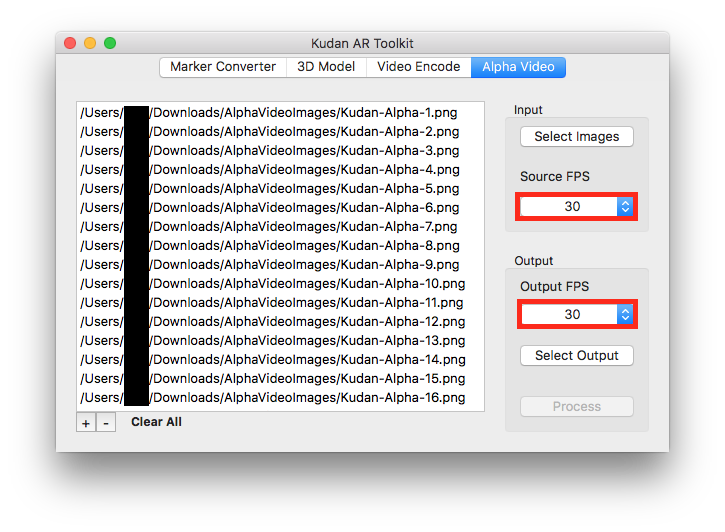
Select the source and target FPS
Once you’re happy with your settings and the images you have selected, you can click Select Output to choose a save location for the output, then click Process to create your Alpha Video.
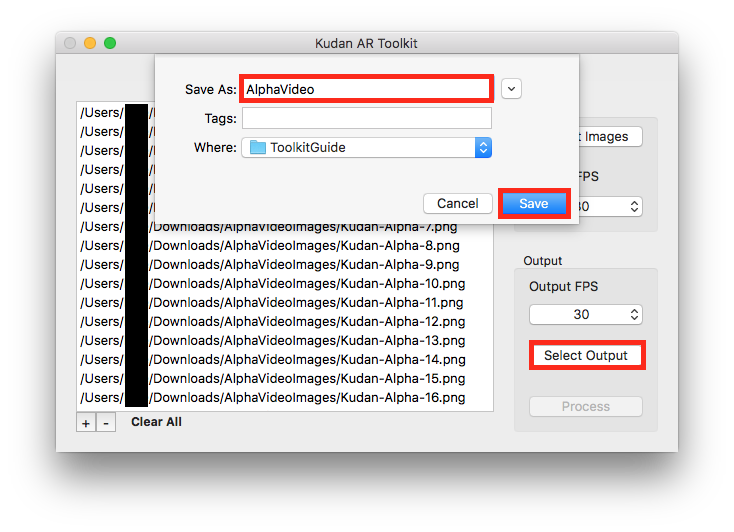
Select an output save location
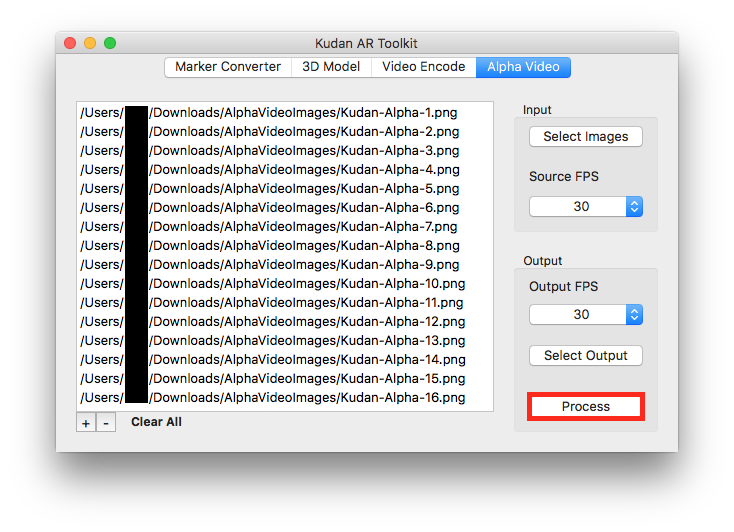
Process your Alpha Video
Empty File
If the encoder returns a file with a size of 0 Bytes, it has created a new file but encountered an error when processing the frames.
Please ensure that both the height and width of each of your selected images is divisible by 2.