This tutorial will show you how to setup Kudan’s Unity Plugin.
1. Download Kudan’s AR Framework for Unity
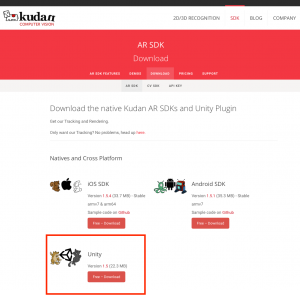
To get started, the first thing you’ll need is Kudan’s Unity Plugin. You can download it on our Download page.
If you don’t have the Unity Engine installed on your machine yet, you’ll also need to download it from Unity’s website and follow the steps of the installation process.
If this is your first time using Unity, or if you are not familiar with the layout and functions of the Unity editor, we recommend going over some of Unity’s basic tutorials and familiarising yourself with the interface before continuing.
Create a new Unity Project
Once you’ve got both Unity and the Plugin, start up Unity up and create a new project. You can call it whatever you like. We’ll be calling ours “Kudan Unity Tutorial”.

Import Kudan’s Unity Plugin
Once the project has been created, the editor will start up and present us with an empty scene.
To add Kudan’s Plugin to your project, right-click in the assets box at the bottom of the window, then go into the Import Package menu and select Custom Package.
Navigate to the Plugin package file, which will be called KudanARUnity.unitypackage and open it. When prompted to select which files and folders you want to import, just click the importbutton to add everything.
You will now have a folder in your assets called “KudanAR”. Inside it are several folders, including one called “Samples”. In the “Samples” folder is a Unity scene called “KudanSample”. Double-click it to load the scene.
Once the scene loads, you’ll notice that your hierarchy has a number of new objects in it. There are objects containing Kudan’s scripts, as well as a simple UI consisting of three buttons that allow us to switch between tracking methods and start/stop markerless tracking.
You can actually test this scene out right here in the editor, but before you can build or run the app, there are a couple of things you need to set up first.
Building the app
If you want to build the app for iOS or Android, or simply try out your AR scene in the editor, please select the appropriate page and we’ll take you through the steps required to get your project up and running:
Building The App for iOS
Building The App for Android
Setting up Play Mode
Running the app
Once you have set up your project, you can either run it in the editor or build it for iOS or Android.
Play Mode
Only marker tracking is supported in the editor right now, so you won’t be able to try out markerless tracking. In order to test markerless tracking, you’ll have to build the project for iOS or Android and run it on a smart device.
Once your app is running, you can try out marker tracking by opening / printing the Lego image found in KudanAR -> Samples -> Textures and aiming your camera at it. A sphere should appear floating above it.
Congratulations on creating your first AR app with Unity and KudanAR!