こんにちは。エクセルソフトの田淵です。
Docker Enterprise Edition(Docker EE)は日本語の情報が(恐らく)ないため、インストール、起動、ライセンス設定方法、Docker Swarm(クラスタ環境)などのエントリーを記載していきたいと思います。
本エントリーではUbuntu 16.04 LTSを使用しています。
まずはダウンロード申請フォームからお申し込みください。ダウンロードURLがメールで届きます。そのページのダウンロード方法の内容に沿って、Docker EE評価版のダウンロードをDockerに申請してください。
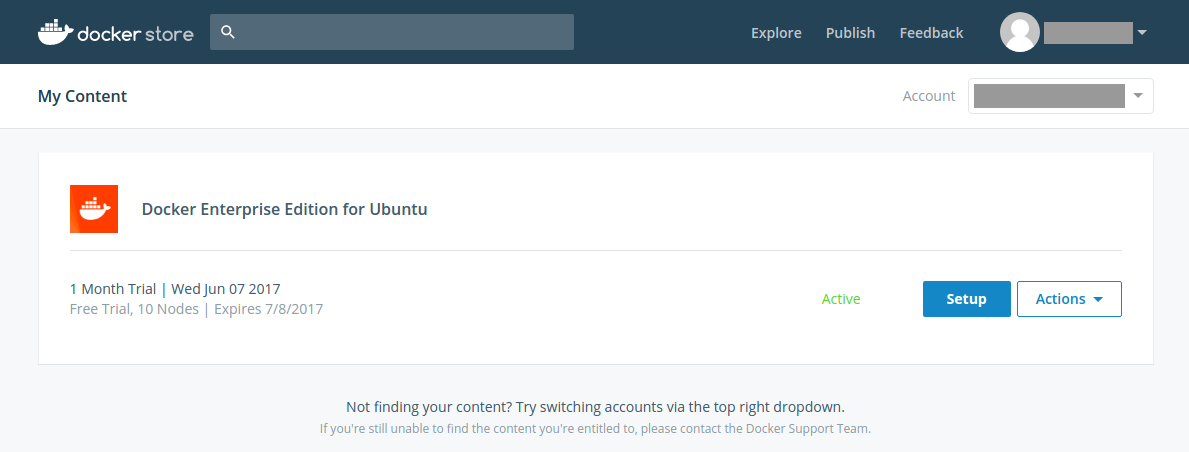
Docker EEの申し込みが完了すると、ダウンロードの説明ページに移動します。
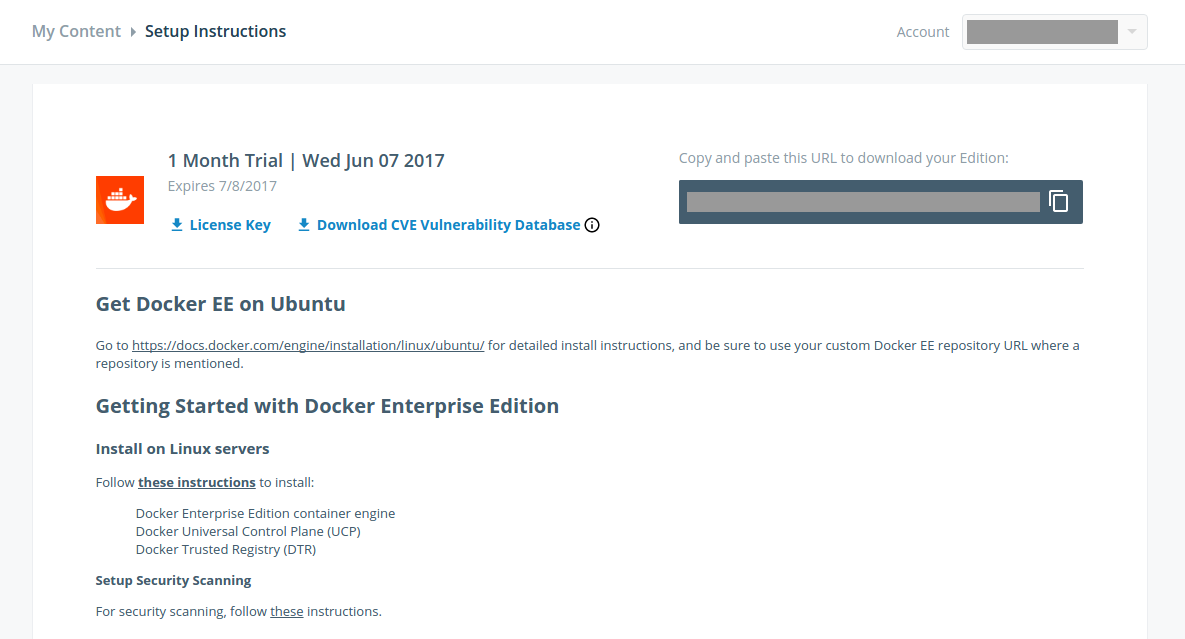
「Setup」ボタンをクリックすると、次のようなライセンスキーなどがダウンロードできるページに移動します。
- License Keyをダウンロードしておきます。
- Docker EEはユーザー個別のGPGキーを使用してダウンロードしますので、「Copy and paste this URL to download your Edition」の下のURLを控えておきます。
Get Docker EE on の先のリンクにインストール手順が書いてあるのでその通りにやっていきたいと思います。
インストール前の準備
まず、以前のバージョンが残っていたら削除します。
$ sudo apt-get remove docker docker-engine
なお、以前のバッケージ名はdocker-engineでしたが、Community Editionがdocker-ce、Enterprise Editionがdocker-eeになりました。
特別な理由がない限り、linux-image-extra-*パッケージをインストールすることを強くお勧めします。インストールすることで、dockerがaufsファイルシステムを使用できるようになります。
[code lang=bash]
$ sudo apt-get update
$ sudo apt-get install \
linux-image-extra-$(uname -r) \
linux-image-extra-virtual
[/code]
多くのユーザーはレポジトリ経由でインストールができます。debパッケージをダウンロードして直接インストールすることも可能です。今回はレポジトリ経由の方法を記載します。
事前に必要なパッケージをインストールしておきます。
[code lang=bash]
$ sudo apt-get -y install \
apt-transport-https \
ca-certificates \
curl \
software-properties-common
[/code]
以下のコマンドの<DOCKER-EE-URL>を、控えておいた「Copy and paste this URL to download your Edition」のキーで置き換えてGPGキーを追加してください。
$ curl -fsSL <DOCKER-EE-URL>/gpg | sudo apt-key add -
追加したGPGキーのフィンガープリントがDD91 1E99 5A64 A202 E859 07D6 BC14 F10B 6D08 5F96であることを確認しておきましょう。
apt-key finger 6D085F96
以下が表示されるはずです。
[code lang=bash]
$ apt-key finger 6D085F96
pub 4096R/6D085F96 2017-02-22
フィンガー・プリント = DD91 1E99 5A64 A202 E859 07D6 BC14 F10B 6D08 5F96
uid Docker Release (EE deb) <docker@docker.com>
sub 4096R/91A29FA3 2017-02-22
[/code]
次にStableのレポジトリを設定します。<DOCKER-EE-URL>は上記でコピーしたものと同じです。
[code lang=bash]
$ sudo add-apt-repository \
"deb [arch=amd64] <DOCKER-EE-URL> \
$(lsb_release -cs) \
stable-17.03"
[/code]
インストール
インストールの準備も終わったので、実際にDocker EEをインストールしていきましょう。
sudo apt-get install docker-ee
注意:複数のDockerレポジトリを登録している場合、
apt-get installとapt-get updateは常に最新のバージョンを使用します。
プロダクション環境で使用する場合は次のコマンドで取得できるバージョンを調べてください。
$ apt-cache madison docker-ee
[code lang=text]
docker-ee | 17.03.2~ee~4-0~ubuntu-xenial | https://storebits.docker.com/ee/ubuntu/sub-36600d4e-3238-4e7b-84a3-430b2d058e58 xenial/stable-17.03 amd64 Packages
docker-ee | 17.03.1~ee~3-0~ubuntu-xenial | https://storebits.docker.com/ee/ubuntu/sub-36600d4e-3238-4e7b-84a3-430b2d058e58 xenial/stable-17.03 amd64 Packages
docker-ee | 17.03.1~ee~2-0~ubuntu-xenial | https://storebits.docker.com/ee/ubuntu/sub-36600d4e-3238-4e7b-84a3-430b2d058e58 xenial/stable-17.03 amd64 Packages
docker-ee | 17.03.0~ee~1-0~ubuntu-xenial | https://storebits.docker.com/ee/ubuntu/sub-36600d4e-3238-4e7b-84a3-430b2d058e58 xenial/stable-17.03 amd64 Packages
[/code]
特定のバージョンをインストールするには、
[code language=”bash”]
$ sudo apt-get install docker-ee=<VERSION>
[/code]
の<VERSION>を上記のバージョンに置き換えて実行してください。
(未確認。17.03.0~ee~1-0~ubuntu-xenialの部分と思われます。)
これでインストールが完了しているはずです。
起動
試しに次のコマンドを実行してみましょう。
[code lang=bash]
$ sudo docker run hello-world
[/code]
次のような出力が帰ってきたら成功です。
[code lang=bash]
Unable to find image 'hello-world:latest' locally
latest: Pulling from library/hello-world
78445dd45222: Pull complete
Digest: sha256:c5515758d4c5e1e838e9cd307f6c6a0d620b5e07e6f927b07d05f6d12a1ac8d7
Status: Downloaded newer image for hello-world:latest
Hello from Docker!
This message shows that your installation appears to be working correctly.
To generate this message, Docker took the following steps:
1. The Docker client contacted the Docker daemon.
2. The Docker daemon pulled the "hello-world" image from the Docker Hub.
3. The Docker daemon created a new container from that image which runs the
executable that produces the output you are currently reading.
4. The Docker daemon streamed that output to the Docker client, which sent it
to your terminal.
To try something more ambitious, you can run an Ubuntu container with:
$ docker run -it ubuntu bash
Share images, automate workflows, and more with a free Docker ID:
https://cloud.docker.com/
For more examples and ideas, visit:
https://docs.docker.com/engine/userguide/
[/code]
アンインストール
念の為、アンインストール方法も記載しておきます。
[code lang=bash]
$ sudo apt-get purge docker-ee
[/code]
作成したイメージ、コンテナ、ボリュームなどは削除されないため、次のコマンドで削除してください。
[code lang=bash]
$ sudo rm -rf /var/lib/docker
[/code]
お疲れ様でした!
次回はPost Installationとして、実行ユーザーの設定やサービスとして起動する方法などを予定しています。
以上です。